Healthy Life Heather

  • Home
  • Heather
    • About Me
    • Contact
    • Disclaimer
  • Healthy Living
  • Wellness Journey
  • Resources
  • Facebook
  • Twitter
  • Instagram
  • Pinterest

Free workout videos online: 4 of my favorites on YouTube

April 14, 2015 by Heather 2 Comments

4 of my favorite full-body FREE workout videos online -- full length and full of variety!

I’ve enjoyed working out 3-5 times a week for about 15 years, and during this time, I’ve tried different videos, classes, routines, and forms of exercise.

In 2013 and early 2014, I put most of my eggs in one basket — running. By the time I completed my first (and to date, only) half marathon, I needed a break to rehab runner’s knee. I had no interest in the stationary cardio equipment at the gym, so I looked to online workouts for inspiration. And once I found the YouTube channels below, I was hooked.

In fact, I’m so hooked on these free at-home workouts that since starting them, I’ve only used my gym membership for weight lifting! With most of the videos being relatively short, I can’t make the excuse that I don’t have time to incorporate fitness into a packed day. When it’s raining, below freezing, or simply too dark outside, I get to workout at home thanks to my laptop and YouTube. If it wasn’t for lifting, I’d cancel the gym membership!

400+ free workout videos online from FitnessBlender

Have you heard of Fitness Blender? If not, I’ve just made your day.

On the FitnessBlender YouTube channel, husband and wife team Daniel and Kelli have created, recorded, and shared over 400 free videos. They cover everything from a stand-alone warm up, to videos focusing on strengthening and toning specific muscle groups, low-impact body weight interval workouts for beginners, high intensity interval training (HIIT), pilates, and more.

I love choosing the length and difficulty of my workout, and I often string a couple of videos together — it’s so easy to customize based on how I’m feeling and how much time I have any given day. And I’ve been amazed that even though I focus on the low-impact, bodyweight interval workouts, I’ve been able to maintain my weight and see small fitness improvements. I’d love to challenge myself with the more intense workouts, but while I’m working on addressing and healing my digestive health issues, I’ve heard numerous times not to add too much additional physical stress to the body — it’s already going through enough!

These are a few of my favorite Fitness Blender videos:

Quiet Cardio Workout – Low Impact No Bounce Recovery Cardio Workout
At minute 6, Kelli shows you their “quiet burpee”. If I’m ever doing one of their videos that features a regular burpee, I always swap it out for a “quiet” one. This low impact version is still a good workout, and after a few weeks of doing quiet burpees a couple of times a week, I noticed I was able to pick up my speed — improving my fitness without the impact on my knees!

Calorie Burning Low Impact Cardio Workout for Beginners – Recovery Cardio Workout with No Jumping
After the quick warm up, the first exercise is a side jack with punches. Like the burpees, if I encounter regular jumping jacks in any of their videos, I substitute a side jack to protect my joints. If you engage and keep your muscles tense, you’ll still feel it!

Short on time? Try the 8-minute Fat Burning Low Impact Cardio Workout – Easy on the Joints Quiet Cardio Training.

I LOVE this Standing Abs, Crunch Free Ab Workout Routine!

If you prefer abs-on-the-floor workouts, I like this 10 Minute Abs Workout — and I have a few others saved on my Abs playlist.

Indoor walking videos with Jessica Smith

Sometimes all you need is a good walk.

Outdoor sunset walk

In the spring, summer, and fall, my husband and I go for a walk after dinner several times a week. When the clocks change and evenings become darker and more chilly, we tend to stay indoors. I don’t know about you, but after sitting most of the day at work, it’s difficult to sit all evening too.

One evening I found Jessica Smith’s 30 Minute Sunset Barefoot Walk. The video is fairly dark, but I love the balance of variety and repetition in the routine, and it’s the perfect length when I just need a little extra movement in my day.

After walking to the video several nights a week for a couple of months, I needed a new walking video — thankfully I found Jessica’s 30 Minute Barefoot Fusion Walk. I also use this one in the evenings after work or on the weekends when I want to walk at the beginning or end of the day and include a longer workout somewhere in the middle.

My new favorite walking video is the 12-Minute Fat Burning Power Walk Home Workout. I tried it for the first time yesterday when I was short on time, and I worked up a little sweat! It’s going to be a great addition to the days I work from home, as it’ll get me up and out of the chair and back to the desk in no time.

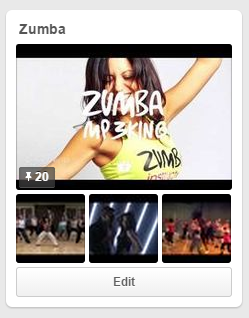
Create your own Zumba workout at home

I’ve LOVED Zumba for years. After a couple of classes, I bought a pair of dance sneakers (like these), and from time to time I’ve thought about getting certified to teach Zumba.

When I started training for the half marathon, I gave up my Friday morning Zumba class to fit in one of my runs. Somehow, I’ve just never made it back to class.

BUT I can still enjoy Zumba from home. There are hundreds of Zumba routines on YouTube, and I’ve pinned just a few on my Zumba Pinterest board.

Zumba Pinterest board

To find more Pinterest boards dedicated to Zumba, first do a search on Pinterest for “zumba”. Then, just above the first row of pins you’ll see four options: All Pins, Your Pins, Pinners, and Boards. Choose “Boards” and you’ll have countless boards to explore and routines to repin!

I’ve also recently created a YouTube playlist with Zumba routines. Using a playlist cuts down on the stop-and-start time of watching videos from Pinterest. There are still ads on the YouTube videos of course, but that usually gives me a nice, brief break in between routines.

Improving my running with Yoga with Adriene

I’ve attended one yoga class in my life.

A colleague who was a Bikram yoga devotee encouraged me to join her for a class, and I must say I was pleasantly surprised I did so well in a hot room for 90 minutes. I might have considered making it a routine thing, but the fee to join the studio was more than my gym membership, and I couldn’t justify (or afford) paying for both.

Last fall, however, I made yoga part of my weekly routine. I found the Yoga with Adriene channel on YouTube and immediately loved Adriene’s Yoga for Runners – Warm Up Sequence. The sequence came at just the right time for a 10k. For some reason, I struggled for two weeks before the race with tight muscles, and I wasn’t at my best. Instead of using the video as a warm up to a run, I played it every night, and I felt fantastic afterward. On the morning of the 10k, I woke up feeling like I could run another half marathon.

Star Wars running costume | Jedi and R2D2

Since then, I’ve tried a few of Adriene’s other videos. She offered a “30 Days of Yoga” series to kick off 2015, which I think I’ll do in June, once I have more time to commit to 30 consecutive days of yoga. Anyone care to join me in the challenge?!

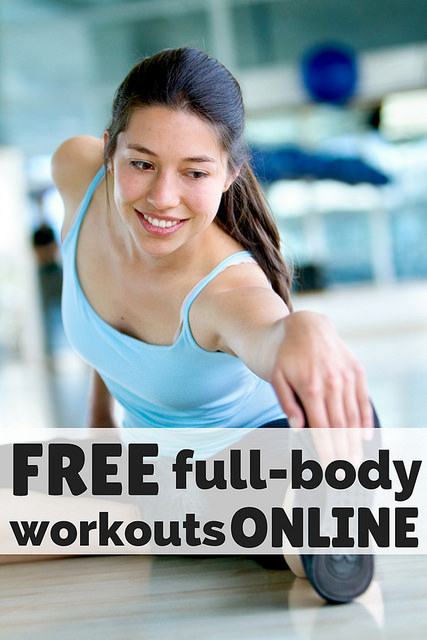
Free full-body, bodyweight workouts

If you’re looking for workouts you can do for free at home (or anywhere you have internet access), I hope one of my favorites above is new to you! I’m always looking for new videos offering full-body, low-impact, bodyweight exercises, so leave your favorite workouts in the comments below.

Filed Under: healthyliving

3 ways to cook butternut squash

March 17, 2015 by Heather Leave a Comment

Disclosure: This page contains affiliate links.

3 ways to cook butternut squash

I never thought I’d say it, but butternut squash is one of my favorite foods. Maybe in the top 10.

Butternut squash (oven-roasted, bite-sized, puréed, sweet, savory, you name it) has been a staple in my diet since starting the GAPS diet and then transitioning to Paleo(ish) in the summer of 2014. Since last May, there’s probably only been 10-15 days where I haven’t had eaten butternut squash in some form during the course of the day.

But I wasn’t always a butternut squash fan. In fact, I didn’t even know what it was until I lived in Australia for a year. Even then it took me months to learn that what Aussies called “pumpkin” (or sometimes “butternut pumpkin”) was what we’d call “butternut squash” in the USA. When I returned home after the year in Australia, I ate butternut squash occasionally but still MUCH preferred sweet potatoes as my slightly sweet starchy carb of choice.

And then the health problems hit and hit hard. While researching my symptoms and various diets, I decided that sweet potatoes would sadly have to sit on the sidelines for a while. Butternut squash became my primary source of carbs, and other than bananas, it continues to be my main source of carbs nearly nine months later. Over time, I’ve found different ways of incorporating it into meals and snacks, and I hope it’s never taken off the list of foods I’m able to eat!

Recently a few friends and family members who are exploring Paleo, eating less processed foods, or simply seeing me post about butternut squash on Facebook all of the time asked how I prepare it. After nine months of buying one to three butternut squash per week, I realized I take for granted how easy it is to prep and cook! I’m going to share three methods I’ve tried, along with recipes featuring some of my favorite ways to get my daily butternut fix.

Learn 3 different ways to cook butternut squash, including a version with no slicing or dicing!

How to roast butternut squash (halves)

Without a doubt, slicing a butternut squash in half and roasting the two halves in the oven is my favorite way to prepare butternut squash. It works for just about any recipe and requires the least amount of time from start to finish of all three methods.

Slicing through them isn’t always easy, however, especially if you don’t own a good knife. If you can only invest in a couple of new kitchen items, get a good knife. It’ll make your life SO much easier (as will a husband who does 90% of winter squash prep — he’s our hand and knife model below).

1. Grab your butternut squash, knife, and cutting board of choice.
2. Slice the top and bottom off and stand the butternut squash vertically with the larger, bulbous end on the cutting board.
3. Slice the butternut squash in half lengthwise.

"Oven-roasted butternut squash halves -- slice in half, scoop out seeds, brush with oil, place face down on baking tray, and bake

Congrats! The hard part is done.

Oven-roasted butternut squash halves -- slice in half, scoop out seeds, brush with oil, place face down on baking tray, and bake

4. Scoop out the seeds (like you would with a carving pumpkin for Halloween). I use a large soup spoon.

Oven-roasted butternut squash halves -- slice in half, scoop out seeds, brush with oil, place face down on baking tray, and bake

5. Brush both halves lightly with olive oil (or cooking fat of choice) and lay face down on a baking tray lined with parchment paper (we use this one).

6. Place tray into an oven pre-heated to 375 F. Cook time will vary based on the size of your squash. We usually set the timer for 40-45 minutes, check the squash, and add on 5-minute increments as necessary. Your squash is done when you can easily pierce it through with a knife.

7. Allow the squash to cool enough to handle. Scoop out flesh and use as directed by your recipe of choice. We’ve been LOVING the butternut squash sauce in this Creamy Sausage and Butternut Squash Spaghetti (using spaghetti squash). Instead of cubing the butternut squash as directed by the recipe, we just use the flesh from roasted halves, as it all gets blended for the sauce anyway!

Peel, cut, cube, and roast butternut squash

Although time consuming, slicing a butternut squash into cubes is a popular method. You can enjoy the bite-sized roasted squash pieces as a side dish, on top of a salad, in soups or stews, or countless other recipes.

We’ve tried several ways of prepping the squash before peeling and cubing and this is what works best for us.

1. Begin as we did with the butternut squash halves — slice off the top and bottom, cut in half lengthwise, and scoop out the seeds.
2. Place each half face down on a cutting board and peel/scrape/cut the skin away, removing as little flesh as possible.

Cut and peel butternut squash, cut into cubes, add oil and herbs of choice, and roast in the oven for a delicious side dish or salad topping

It may take a while to get to a naked half, but once you’ve done it, you’re half way there!

Cut and peel butternut squash, cut into cubes, add oil and herbs of choice, and roast in the oven for a delicious side dish or salad topping

3. Cut the butternut squash into cubes or randomly sized chunks. I prefer fairly small 1/2 inch cubes. They cook faster and get a nice caramelization on them.
4. Toss with olive oil (or cooking fat of choice) and season with salt and pepper (to taste) and any other herbs or spices you like.
5. Spread evenly over a baking tray lined with parchment paper and bake at 375 F. We cooked the gorgeous bites below for 35 minutes. Stir/flip the pieces at least once during roasting for a more even cook and color.

Cut and peel butternut squash, cut into cubes, add oil and herbs of choice, and roast in the oven for a delicious side dish or salad topping

We topped a spinach salad with the butternut pieces above, but at the moment my favorite bite-sized butternut recipe is this roasted butternut squash with paprika and turmeric. YUM.

Roast a whole butternut squash in the oven

If you’re not up for peeling, cubing, or even slicing a butternut squash, this is the method for you.

1. Pierce your butternut squash with a large knife in 3-5 spots (depending on the size).
2. Place on a baking tray lined with parchment paper and pop into an oven preheated to 375 F.

How to cook a whole butternut squash in the oven -- no cutting until it has cooked!

3. Rotate the squash every 20 minutes or so to achieve a more even cook and avoid burning the bottom.
4. The first time we tried this method, we took our butternut out at 65 minutes, thinking it was ready. While cooked through, it wasn’t as soft as I would like. I recommend setting your timer for 1 hour for a smaller squash and adding 5-minute increments as necessary. You may need up to 90 minutes for a larger squash.

How to cook a whole butternut squash in the oven -- no cutting until it has cooked!

5. Allow the cooked squash to cool enough to handle and slice in half. Scoop out the seeds. Remove flesh and use in recipe of choice.

How to cook a whole butternut squash in the oven -- no cutting until it has cooked!

I added the butternut above to a food processor and used the mash/puree to top my favorite winter squash shepherd’s pie recipe (which I make with several modifications for my food allergies + intolerances).

Roasted butternut squash
 
Save Print
Prep time
5 mins
Cook time
40 mins
Total time
45 mins
 
My favorite way to prepare butternut squash -- roasted halves.
Author: Heather
Ingredients
  • 1 butternut squash
  • 2-3 teaspoons of liquid/melted cooking fat (I use olive oil)
Instructions
  1. Preheat oven to 375 F.
  2. Grab your butternut squash, knife, and cutting board of choice.
  3. Place the butternut squash on the cutting board length wise and slice the top and bottom off (about ¼ to ½ inch, just enough to remove the stalk).
  4. Stand the butternut squash vertically with the larger, bulbous end on the cutting board. Slice the butternut squash in half lengthwise.
  5. Scoop out the seeds (like you would with a carving pumpkin for Halloween).
  6. Brush both halves lightly with olive oil (or cooking fat of choice) and lay face down on a baking tray lined with parchment paper.
  7. Place tray into pre-heated oven. Cook time will vary based on the size of your squash. For a medium-size squash, I recommend setting the timer for 40-45 minutes. Then, check the squash and add on 5-minute increments as necessary. Your squash is done when you can easily pierce it through with a knife.
  8. Remove from oven when done and allow the squash to rest until it's cool enough to handle.
  9. Scoop out flesh and enjoy in your recipe of choice.
3.3.3070

If you’ve never cooked a butternut squash, I hope you’ll use one of the methods above and roast one soon! If you’re a fellow butternut squash fan, what’s your favorite method? Any recipes you absolutely LOVE?

Learn 3 different ways to cook butternut squash, including a version with no slicing or dicing!

Filed Under: healthyliving Tagged With: recipe

What to expect from a Hydrogen Breath Test for Small Intestinal Bacterial Overgrowth (SIBO)

March 15, 2015 by Heather Leave a Comment

I don’t think I’ve ever wanted to visit the hospital so badly as I did last month.

Before the age of 8, I was sick off and on for several years and was in and out of the hospital for various tests. While the early childhood hospital stays initially made me brave, by the time I was 10, I was scared of even going to the doctor for a routine check up. I’d had my fill of doctor visits and hospital tests.

Fast forward more than 20 years to the summer of 2014. After trying to resolve my digestive health issues with the GAPS diet, I found that I was still suffering on a daily basis from pain, discomfort, bloating, and very visible distension. I learned that a persistence of symptoms even on a clean diet could indicate fairly serious but treatable conditions. As Chris Kresser, one of my faves in the health and wellness space, likes to say “test, don’t guess” — so I decided to start working with a functional medicine doctor who could help me order the tests I needed to identify, treat, and heal the underlying causes of my chronic digestive distress.

One of the tests I most wanted to run was the hydrogen breath test, noted by many as the “gold standard” test for diagnosing small intestinal bacterial overgrowth (SIBO). While many GI health issues have overlapping symptoms, I was fairly positive that I had SIBO, and after getting to know me and monitoring my behaviors and symptoms for a couple of months, my doctors thought there was a strong possibility too.

In the hydrogen breath test, a patient consumes a sugary solution. If there is an overgrowth of bacteria in the small intestines, the bacteria will feed on these sugars and then produce hydrogen and/or methane, which can be measured through the breath. Sounds like fun, right?!

what-to-expect-from-hydrogen-breath-test

What I didn’t expect from the test — the emotional element

Once we found that the local hospital offers the test, my doctor sent in a request to schedule it. I anticipated I’d have to wait a couple of weeks to been seen. Instead, I learned the hospital didn’t have an opening in their schedule for another 2.5 months.

It was difficult waiting for the test, especially during the Thanksgiving, Christmas, and New Years holidays. I just wanted to know whether or not SIBO was a contributing factor to my health problems so I could keep moving forward on this journey to wellness. But as much as I wanted the test, I almost cancelled it four or five times in the three weeks leading up to the date. While the hydrogen breath test IS the gold standard for diagnosing SIBO, it’s not perfect, and I’d read stories about false negatives. I started doubting myself and the process, questioning why I was spending money on an imperfect test to look for something I may not even have. After days of wrestling with unexpected stress over a test I had wanted so badly for over half a year, I finally decided to move forward. Better to make decisions based on data versus guess work.

I think I was also nervous about the test because while I expected (and wanted) it to be positive (I’d have something specific to treat!), I also dreaded the side effects I’d no doubt experience during the test and possibly for days afterward. The side effects? Those all-too-familiar painful, uncomfortable symptoms I experience on my worst days. I’d never willingly bring those on except for in a test that could help me determine the next best course of action.

Just keep swimming – keep hope alive during the journey to wellness

Hydrogen breath test instructions from the hospital

Shortly after scheduling the test, I received a letter from the hospital with pre-test instructions.

hydrogen breath test hospital instructions

My hydrogen breath test experience

On an overcast, gloomy Monday morning, I drove to the local hospital and arrived 45 minutes before my appointment. I’m glad I did! The hospital had my maiden name only on my official record. The fax machine wouldn’t send a copy of my driver’s license to the department that could update my record. The insurance card scanner wasn’t reading my card properly. It was a Monday morning.

As the waiting room filled up, I tried to relax and ignore the butterflies.

Right on time, a nurse called my name and took me back to a private, comfortable room where I’d spend the next few hours. And right away, she showed me the hydrogen breath test kit.

What to expect during a hydrogen breath test for small intestinal bacterial overgrowth (SIBO) | breath test kit

Every 20 minutes, I would need to inhale normally and then exhale normally, breathing out and into the mouth piece shown above. I was to exhale until I couldn’t any more. The small collection bag would inflate with my breath. Then, I would need to remove a sample of that breath with a plastic syringe, which has a component I could turn to “lock” in the breath sample.

First, we took a sample of my breath to identify a baseline that future samples would be compared to. This also serves as a practice run to show the nurse you know how to handle the rest of the test, as it’s largely self-administered.

After the baseline breath sample was taken, I consumed a lemon-flavored sugar-packed drink. I’d read that the hydrogen breath test may use a lactulose or glucose solution, and the nurse said that my drink contained dextrose, which is a form of glucose. I came into the test with the intention of asking for the ingredients and taking a picture of the bottle, but once I stepped into the test room, I completely forgot about it, other than to jot down the mention of dextrose!

What to expect during a hydrogen breath test for small intestinal bacterial overgrowth (SIBO)

Since I’d need to take samples every 20 minutes, the collection tubes/syringes were all pre-labeled.

What to expect during a hydrogen breath test for small intestinal bacterial overgrowth (SIBO)

While I waited to take my first sample, the nurse asked me to monitor and share any symptoms I may experience, mentioning that in addition to typical GI side effects, headaches were also quite common.

It’s been 7-8 months since I’ve consumed that much sugar at once, and I initially felt slightly jittery from head to toe while the sugar rushed through my system. My throat also felt a little raw, as if I’d been yelling and cheering at a sporting event the day before.

What to expect during a hydrogen breath test for small intestinal bacterial overgrowth (SIBO)

Every 18 minutes (I was given a timer to help me accurately keep track!), I eased the next syringe into the nozzle on the collection bag. I took a breath in, exhaled all of the breath into the bag through the mouth piece, and then pulled up on the syringe pump. To lock in the sample, I turned a small dial 90 degrees before removing the syringe from the bag. Then it was time to reset the timer to 18 minutes. Too easy.

Below is syringe 6, ready to be analyzed, and syringe 7, waiting to be used in 18 minutes.

What to expect during a hydrogen breath test for small intestinal bacterial overgrowth (SIBO)

Between samples, the nurse said I could stay in the room or walk around the hospital lobby as long as I brought the timer with me. I didn’t expected I’d be encouraged to get up and move, so I opted to leave the testing center and walk on three occasions. I brought more than enough reading material to keep me company, but all I managed was a few pages.

hospital reading material

Every 2-3 samples, the nurse returned to ask about changes in symptoms and add the collected breath samples to these machines. They instantly measured the amount of hydrogen and methane in each sample.

What to expect during a hydrogen breath test for small intestinal bacterial overgrowth (SIBO)

What to expect during a hydrogen breath test for small intestinal bacterial overgrowth (SIBO)

Toward the end of the test, the nurse started comparing these readings to the baseline. She shared that based on the numbers, it wasn’t likely that I had SIBO. At that stage, I wasn’t surprised.

What I least expected from the hydrogen breath test

As soon as I left the hospital, several people checked in on me to learn how it had gone. I found myself sharing the same message with everyone — it perfectly described how I felt.

I’m home from the hospital. The test went very well. Like suspiciously well. Other than feeling jittery from the sugar, I felt normal from start to finish with none of bad symptoms I was expecting. Nurse thinks readings look normal. Relieved to feel fairly normal (I thought I would be miserable all week!!!) and also sad/disappointed that the results will most likely be negative as I was 90% sure this would be it and I would finally have a diagnosis. I was positive SIBO was one of the problems. I just wanted to finally have a diagnosis because there are protocols to treat it. Now what…? Oh well, guess I’ll see what happens at the next doc appt in mid-February!

Words cannot express how shocked, pleased, and disappointed I felt at all once.

It was a blessing to breeze through the test with no pain, discomfort, or other negative symptoms. What was even better was that I didn’t spend the next few days in agony. Once something triggers my symptoms, it usually takes a full week before I might have a good day again.

And though I felt oh-so-grateful for feeling well during and after the fact, I couldn’t escape feelings of disappointment. Nothing had happened. Not a hint of bloating. Not a whisper of discomfort. Not a single sign that suggested, “hey, this might be SIBO after all!”

I felt a little silly for thinking it could be SIBO for the better part of a year. I felt let down that my body didn’t respond as I expected it to do. I felt ridiculous for feeling disappointed. I wondered how much this test was going to cost.

I spent the next few days assuming that I didn’t have SIBO. My new doctor once said that I was the “perfect storm” and probably have multiple things going on that will take some time to figure out. People have always said I’m an overachiever, and it looks like it’s no different with my gut health — THE PERFECT STORM!

the perfect storm of GI issues

When I met with my doctor in mid-February, he shared that the test results were indeed negative. After revisiting the differences in the glucose and lactulose drinks, I wonder if the glucose test was the right one for me. Dr. Allison Siebecker, considered by many as THE expert on all things SIBO, shares an important distinction between the two on her website — each type of drink solution best measures overgrowth in different parts of the small intestines! With that in mind, I’m not 100% ready to rule out the possibility of SIBO.

So what’s next?

I need to continue to pray about my health and have faith in the functional medicine process. I need to maintain the positive outlook and attitude I’ve had 90% of the time and allow myself the 10% where I wrestle with the mental and emotional toll that comes along with chronic health concerns.

If you found this page because you’re thinking about the hydrogen breath test but can’t find a place that administers it, Dr. Siebecker has shared a list of at-home test kits to consider.

Have you taken the hydrogen breath test? Was your experience different to mine? I’d love to hear your story. Let’s support one another on our road to wellness.

Filed Under: wellnessjourney Tagged With: sibo

So what can you eat?

March 10, 2015 by Heather 5 Comments

What can I eat | Healthy Life Heather

One of the questions I’m asked most frequently is “what in the world CAN you eat?!”

When I first eliminated gluten, dairy, and soy, people wondered if I had enough food options remaining. I had plenty!

Nowadays, as I work on healing longstanding gut-health issues with a strict diet, people express concern over what is left for me to eat. Still plenty! When you have as many restrictions as I do, you have to focus on what you CAN eat versus what you CAN’T.

What’s safe and what’s not

As of today, here’s my safe, unsafe, and up-for-debate list of foods. Most of the time I’m happy to be dedicated to following this list, as I’m starting to have good days again! Once in a while I feel frustrated and discouraged. The emotional, mental, and physical strain of chronic illness sets in, and I long for eggs and mango, two of my favorite foods.

Nevertheless, I realize how incredibly fortunate I am to have access to safe and bountiful amounts of food. I’m so grateful for what I can and do have.

foods-to-avoid

  • gluten
  • dairy (including ghee)
  • soy
  • refined cooking oils
  • refined sweeteners (though I have been sneaky and had cane sugar in some otherwise allowed treats)
  • grains (even gluten-free ones — and no rice, corn, or oats in particular)
  • legumes (beans, lentils, peanuts)
  • starchy tubers (white potatoes, sweet potatoes, taro, cassava/yuca, etc.)
  • apples, stone fruit (avocado, apricot, cherries, mango, plums, peaches, etc.), watermelon
  • mushrooms
  • brassica family vegetables, like cruciferous veggies and cabbages (I know I can’t handle kale, cauliflower, broccoli, or brussels sprouts)
  • coconut (flour, oil, milk, sugar)
  • eggs (both the whites and the yolks)
  • bayleaf, cloves, cumin, dill, horseradish, oregano
  • clams, oysters

foods-to-eat

Fruit

  • bananas, berries, citrus
  • dates, figs, and prunes (although high-FODMAP (see below), these seem to be just fine for me in small quantities once in a while)

Vegetables

  • spinach and greens not in the brassica family
  • zucchini and summer squash
  • winter squash, especially butternut, spaghetti, and acorn squash
  • carrots
  • bell peppers
  • tomatoes
  • peas and green beans (though considered legumes, these work well for me)
  • onion, garlic, shallots (thankfully these are the one group of high-FODMAP foods that I’m able to eat with no problem)

Meat
We choose meat from animals that weren’t raised with hormones or antibiotics. When possible, we select grass-fed, pastured, and/or local sources.

  • chicken
  • turkey
  • pork
  • beef
  • bison
  • lamb

Seafood
While I eat salmon once a week, I rarely eat other types of seafood. I’m sure there’s more I could eat.

  • wild-caught Alaskan salmon
  • shrimp
  • tuna (I buy a brand of skipjack tuna which is said to have less mercury)

Nuts and seeds
I seem to be fine with all nuts and seeds except peanuts and perhaps cashews. Almonds and hazelnuts are both considered high-FODMAP but I am fine with both in moderate amounts. I especially like chia seeds, flax seeds, and sunflower seed butter (i.e., sunbutter).

Fats

  • Extra virgin olive oil (EVOO)
  • Lard (we use leaf lard from pastured pigs from a local farm)
  • Tallow (similar to lard but it comes from cows — our source is also pastured and local)

Sweeteners

  • honey (usually raw and often local)
  • maple syrup and maple sugar
  • stevia (I use a few drops of liquid stevia from time to time)

foods-in-question

Quinoa
Though it’s a seed and not a grain, it can behave like a grain. I removed it last summer and recently reintroduced 1/4 cup with no problems. I’m waiting until early summer to try again — if it goes well, I’ll see if I can have a small amount of quinoa once a week.

Plantains
Plantains offer a wonderful source of resistant starch, but starch and I haven’t been on the best of terms the past couple of years. While tubers are still on the “cannot tolerate” list, plantains seem to be fine if I eat small amounts from time to time. I’ve had them once a month for the last three months and I’m hoping this trend can continue.

Cashews
I don’t eat cashews often, but when I have over the last few months, I’ve never had a problem. Until last time. I soaked cashews for a few hours before blending them into a wonderful “cheese” sauce for a paleo lasagna — my first lasagna in I can’t tell you how long. And it was heavenly. But within an hour or two I didn’t feel so great. I thought every ingredient in the dish was safe, so I shrugged it off. When I had leftovers the next day, the same thing happened again. Puzzled, I revisited lists of high-FODMAP foods, and wouldn’t you know, cashews were listed.

I’m not sure why they bothered me this last time, but I’m going to wait a while before reintroducing them. I’m disappointed — I really loved that lasagna.

Cane sugar
While I have limited cane sugar, I haven’t eliminated it altogether. From time to time I indulge in Enjoy Life’s dark chocolate chips or Justin’s nut butters (especially the hazelnut).

Alcohol
I enjoy an occasional glass of wine, though I did avoid alcohol last summer during my GAPS diet experiment. I’ve only had a few glasses while tackling my health issues, and if I need to avoid it again in the future, I’ll do so.

So how did I arrive at the lists above?!

Gluten, dairy, and soy free

It wasn’t until I was 27 that I was told to try removing gluten, dairy, and soy from my diet. When I did, bloating subsided, I lost weight, and I had more energy. If people asked how I could possibly give up pizza, ice cream, pastries, and other familiar foods, I think feeling and looking healthier just about covers it!

But let’s be honest. It hasn’t always been easy. In fact, I wasn’t 100% gluten, dairy, and soy free for a long time. Until 2012, I lived by an 80/20 rule, where I mostly avoided them. From time to time, I’d have a bite or two of something “special”. Sometimes I felt badly immediately afterward or a few hours later. Sometimes I didn’t feel poorly at all. And because I didn’t always feel the consequences, I was willing to gamble every once in a while for a bite of pizza, baked good, or a family member’s tempting restaurant meal.

In the fall of 2012 I started feeling sick fairly often, so I probably went by a 90/10 rule. Smart, I know.

Finally, at the beginning of 2014 I decided to eliminate gluten and dairy 100%. It was challenging at first not to even have one *tiny* bite or *super small* sip of something “special”. Over time, I found it was much easier both for me and those around me if I was 100% committed.

I know there’s been a lot of debate about whether or not non-celiac gluten sensitivity is real. Whether science supports it or not (and every month it seems like new evidence supports or refutes it), I know that I’m one of countless people who can’t eat gluten without feeling sick. Perhaps there’s an underlying issue and it’s not really all gluten’s fault. But for now, and most likely for the rest of my life, I’m not eating gluten. It’s just not worth it to me.

GAPS and Paleo-ish

Perhaps it was due to living by the 80/20 rule above, or perhaps it was inevitable, but in 2013 and 2014, I found that the list of foods I could no longer tolerate was slowly starting to grow. For a year, I removed all nuts and seeds. Oh man, did I miss nut butters.

As I became more and more sick, I looked to online resources for ideas. In a short period of time, I read numerous examples of people like me who suffered persistent GI problems but didn’t know what to blame. These folks decided to go beyond gluten free and go grain free, and they all felt much better for it.

The more I read, the more I realized that I probably suffered from leaky gut, meaning that the lining of my small intestines had been compromised. In short, my small intestines was allowing food molecules to pass through its lining and into my bloodstream, which triggered my body’s self-defense systems to fight the invaders of my bloodstream. My body began interpreting these foods as threats, which directly contributed to my growing intolerance to various foods. In order to get these food sensitivities under control, I’d first need to repair the small intestines and GI tract.

So in the summer of 2014, I abandoned my gluten free + dairy free + mostly vegetarian way of eating to start the GAPS diet (which includes a lot of meat). Since ending the 2.5 month-long GAPS experiment, my diet can best be described as paleo-ish. I don’t eat grains (even gluten-free ones), legumes (beans, lentils, peanuts), refined sugar, processed foods or refined plant oils (e.g., canola, safflower, soybean, etc.). Alcohol isn’t considered to be paleo, but I have had the occasional glass of red or white wine. Some differ on whether or not green beans and peas should be considered legumes or not for the purposes of paleo. I tolerate them just fine, so they stay! I’m happy to be paleo-ish.

Allergy testing

In the fall of 2014, I started working with an integrative medicine doctor, and one of our first orders of business was to run a food allergy test using blood samples (we used the IgG Food Antibody Assessment from Genova Diagnostics). When the results returned, I found some not-so-surprising culprits, along with two foods that I was shocked to see.

Based on my results, I needed to say goodbye to:

  • wheat, corn, oats, rice, yeast
  • clams, oysters (didn’t eat them anyway)
  • watermelon
  • mushrooms
  • coconut
  • egg whites and egg yolks
  • bayleaf, cloves, cumin, dill, horseradish, oregano

While many might think that giving up gluten or dairy would be the hardest food challenge I’ve ever taken on, it was eliminating eggs and coconut that hit me the hardest. I’d never had problems with them before (that I was aware of), and they had become a daily staple while I explored a paleo approach to eating and healing. My doctors encouraged me to remove them for 30 days and then reintroduce them with a particular schedule. Unfortunately, the reintroduction trials were unsuccessful, and I’m waiting six months until I try again.

FODMAPs

One year ago, I had no idea what a FODMAP was. In the last few months, the notion of a low-FODMAP diet has appeared numerous times in mainstream media.

I stumbled upon the concept of FODMAPs before my first appointment with the integrative medicine team. I had been pronouncing it “food-maps” in my head until my new registered dietitian (RD) said “fod” (rhymes with “nod”) “maps”. Oh yeah.

FODMAP stands for Fermentable Oligo-, Di-, Mono-saccharides And Polyols. What?!

FODMAPS are types of carbohydrates that are not digested and absorbed well. These carbs feed bacteria in our body, which then produce gas. These carbs can also contribute to pain, bloating, and motility issues (meaning things move too quickly or not at all).

I already knew that certain FODMAP-containing foods caused problems before knowing they fell under the term FODMAP. When the RD asked me to experiment with removing FODMAPs from my diet, I happily did so.

Guess what — there are SO many fruits and veggies that are high-FODMAP foods. When I went paleo, I never thought I’d need to cut back on the types of vegetables I ate. Many paleo food bloggers share gorgeous recipes with high-FODMAP foods, but I’ve learned that just because a “cheese” sauce with cauliflower or cashews sounds like a great idea, it doesn’t necessarily feel like a great idea. Trust me.

Here’s a great list of high-FODMAP foods, and if you’re wondering what’s left, here’s a list of low-FODMAP foods. Thankfully I tolerate a few high-FODMAP foods quite well and keep them in my diet.

If you’re new to FODMAPs, I think these reads from Standford Health Care, Dr. Jockers and The Paleo Mom are helpful. Dr. Sarah of The Paleo Mom includes a list of foods that are paleo friendly AND low-FODMAP. I consulted the list often when I first made the transition to paleo PLUS low-FODMAP.

Bottom line: JERF

No matter where my wellness journey takes me, my food philosophy moving forward is to “just eat real food” or “JERF”, as Sean Croxton encourages his readers and listeners. I feel better in the short term eating real, whole foods, and I’m betting they’ll help me feel better in the long run too.

Filed Under: healthyliving

GAPS Diet Preparation: Intro GAPS

March 5, 2015 by Heather Leave a Comment

Disclosure: This page contains affiliate links.

Tips for GAPS diet intro phase preparation | Healthy Life Heather

Last summer I started the GAPS diet in an effort to help heal my GI tract.

Before starting GAPS, I compared it to similar diets that offer holistic approaches to treating food sensitivities, digestive issues, and other health concerns. I’m so glad that I spent HOURS reading blogs, locating recipes, and mentally preparing myself for a diet that suggests adhering to it for at least six months. Now that I’ve concluded my GAPS experiment, I want to share my experiences in case my journey can be helpful to someone else.

GAPS diet reading

Before I began the GAPS intro diet on May 23, 2014 I had poured hours of time into reading about the diet in the evenings and on weekends.

Every blog post and article I read highly recommended purchasing Gut and Psychology Syndrome, written by the creator of GAPS Dr. Natasha Campbell-McBride. Although many of the key elements of the diet can be found for free online at The GAPS Diet, I’m glad I ultimately decided to buy the book, as it goes into more detail than any of the GAPS related websites do.

In addition to the official GAPS book, everyone suggested buying What Can I Eat Now? 30 Days of recipes and tips for the GAPS™ Intro Diet from Cara of Health, Home & Happiness. I wondered if I would benefit from the e-book since I had already found GAPS recipes on my own. One day, Cara’s e-book went on sale, and I snatched it up! Reading the recipes and to-do lists made me feel better about my own plan and research. While I did not end up following Cara’s plan (since I’d already developed my own), I can see how helpful the resource would be for someone who doesn’t love to research and plan as much as I do!

The reading prep I enjoyed the most was spending COUNTLESS hours on Pinterest and food blogs, looking for GAPS recipes.

GAPS intro diet preparation

For GAPS (and for my specific pre-existing food issues), recipes had to be free of grains, gluten, dairy, soy, nuts, seeds, legumes, starches, and low in sugar (only raw honey and some fruit allowed). Many paleo and real food bloggers also share GAPS compliant recipes, though some will need a few changes, like swapping out sweet potato (not allowed on GAPS) for butternut squash.

GAPS intro diet preparation

Many of the recipes I pinned are found on these sites — I subscribe to them all and continue to have new recipes delivered to my inbox.

AIP Lifestyle
Grass Fed Girl
Comfy Belly
Fork and Beans
Tasty Yummies
Wellness Mama
Against All Grain
The Paleo Mom
Gutsy
The Urban Poser
Paleo Leap
Plaid and Paleo
Meatified
Savory Lotus
The Well Fed Homestead
Nourished Kitchen
The Healthy Foodie
Detoxinista
Nom Nom Paleo
Empowered Sustenance
Phoenix Helix
Autoimmune Paleo
PaleOMG
Purely Twins

The GAPS intro diet follows six stages, and each new stage allows you to introduce additional foods to your diet. Since vegetables are a huge staple of the diet, preparing meals from scratch can take quite a bit of time with all of the peeling, chopping, slicing and dicing. To save time AND to make sure I was only eating the foods I was allowed at each stage, I copied and pasted the recipes I had pinned into a Word document, being certain to list them by stage.

GAPS diet food preparation

After I found healthy, GAPS compliant recipes and read the GAPS book, I started purchasing and preparing some of the GAPS staples.

GAPS diet and bone broth

First, I sourced beef and chicken bones (from grass fed and pastured animals) so I could make homemade bone broth. Homemade broth is essential to GAPS, and I assumed I would find the best prices online. While I found some good deals, companies required shoppers to purchase much more than I needed, and shipping rates were higher than I liked. Thankfully I soon found three sources of bones in my own backyard! In Charlottesville, I purchased beef bones from The Organic Butcher, JM Stock, and Rebecca’s Natural Food and chicken bones from Rebecca’s. If you can’t find bones locally, the websites I found and compared include US Wellness Meats, Good Earth Farms, Grow and Behold, Slanker’s Grass-fed meats, and KOL Foods.

Chicken bone broth with spaghetti squash, zucchini, carrot, onion, chicken, and basil
Intro GAPS diet soup

I wanted to make as much broth as possible in a short amount of time, so I borrowed my mom’s crock pot and set it up just beside mine. I made the broth in mid-to-late spring, but the heat from both crock pots made the apartment really warm. I realized if I didn’t make enough in the spring, making it in the high heat and humidity of summer would be miserable!

Once the broth was done, I portioned it into numerous BPA free containers (I used these), labeled them with the type of broth and date, and sent them to my parents who could store the broth in their basement freezer.

While I was preparing the broth, I scouted for other GAPS staples that would be new additions to our kitchen.

GAPS diet and cooking fats

We had been cooking and baking with olive oil and coconut oil exclusively, but animal fats from grass-fed, pastured sources are at the heart of GAPS and the only fats allowed in the early stages (unless you can tolerate ghee, which I chose to skip after not tolerating it well previously). I had come to enjoy eating generous amounts of healthy fats from olive and coconut oil, but I was not excited about adding tallow (beef) or lard (pork) as new fats.

Committed to doing the diet properly, I found tallow from Fatworks at a shop in town (though $20/jar it lasted longer than expected), and I picked up a generous container of leaf lard at JM Stock for just $5. I was nervous that the animals fats would have unhealthy consequences, but all of the reading I’d done suggested that as long as animal fats come from healthy, more natural sources, they provide numerous health benefits.

I’m glad to say that after nine months of cooking with animal fats, I haven’t gained any weight, and aside from my digestive issues, my doctor was very pleased with the results of my other tests. I shouldn’t have been surprised — after all, I didn’t gain weight when I started eating saturated fat from coconut oil (I actually slimmed down!), but I had to mentally overcome years of hearing and believing saturated fats in animals were completely unhealthy. I now really love using them to sauté veggies, wilt spinach, cook burgers, and more! A recent allergy test took all things coconut off of the menu, so at the moment we’re cooking almost exclusively with tallow and leaf lard.

GAPS diet cooking fats

If you’re new to coconut oil, try one of my favorites — Dr. Bronner’s or Nutiva.

GAPS diet and fermented foods

Raw, unpasteurized fermented foods are another GAPS staple and something I’ve never included in my diet. I wasn’t looking forward to adding sauerkraut juice to soup or a few bites of sauerkraut to meals. Instead of preparing my own, I went with another local source! I’m so thankful that Farmstead Ferments exists in my own backyard, and after trying three flavors, I can say without question that the Garlicky Greens is my favorite. This kraut is different than the stuff you’d normally find on the shelf. It tastes and smells soooo much better.

GAPS diet sauerkraut and kraut juice

I realize that I am incredibly fortunate to live where I do. We have so many wonderful farmers in Virginia, and I’m able to purchase local grass fed ground beef from pastured cows, pastured chicken, and eggs from pastured chickens who ate non-GMO and non-soy feed.

In the final week leading up to GAPS, my awesome husband peeled and cubed four butternut squash. Two of them were the tallest I’d ever seen. We filled two 1-gallon freezer bags to their max, and whenever I wanted to steam and puree squash in the first few weeks, all I had to do was go to the freezer. We also peeled and chopped enough veggies to get me through the first few days of soups. I highly recommend pre-diet peeling, chopping, and freezing!

In the final days of prep, I also borrowed my parents’ juicer and purchased stainless steel thermoses to carry my soups in for work I bought three of these. Microwaves are not allowed on GAPS, so each morning I had to warm up enough soup for breakfast and for work, and I also carried a small thermos of bone broth to sip between meals.

GAPS diet detox preparation

One of the ways GAPS differs from similar diets is the use of nightly detox baths.

Using the suggestions from the posts on my GAPS info and preparation board, I decided to rotate through adding epsom salts, apple cider vinegar, and baking soda to my baths. Someone recommended fine grain epsom salts from Salt Works, and I still have half of a 25lb bag!

GAPS also suggests reviewing the body care and home cleaning products we use to find the cleanest, least toxic options. I like using the Environmental Working Group’s (EWG) Skin Deep database to compare body care products and am still in the process of swapping out everything from deodorant to shampoo to toothpaste. I’ll write a future post about all of the changes I’ve made!

GAPS diet supplement preparation

Finally, before GAPS started I reviewed the supplements I was currently taking and compared them to the ones Dr. Campbell-McBride recommends. Thankfully I was already taking a probiotic, digestive enzymes, and essential fatty acids (through a fish oil capsule), but I was missing the cod liver oil. I must admit that once I decided on a brand and even located it here in town, I never started taking it. There are so many supplements out there and SO many brands offering the same supplements, it can be difficult to know which ones to choose. I highly recommend working with a naturopath, nutritionist, or integrative/functional medicine practitioner to help decide what’s best for you! I’ve been working with an MD and RD at an integrative medicine practice for eight months and it’s helped tremendously.

What’s next?

I’m so glad I took the time to prepare for GAPS. I found that mentally, I was ready to take on the challenge, and the preparation made the first week easier than expected.

In upcoming GAPS posts I look forward to sharing my experience on the six stages of the intro diet, including successes, missteps, and surprises.

If you’re considering a big diet change, what’s your biggest motivation for taking the plunge? What’s a healthy choice that you’ve made for yourself lately?

Filed Under: wellnessjourney

  • « Previous Page
  • 1
  • 2
  • 3
  • Next Page »

About Me

Welcome! I'm Heather, and I'm on a mission to restore my health through food, functional medicine, and faith. On Healthy Life Heather, I'll share the information and resources I'm using in my road to wellness in hopes that they can help you too. Oh, and if you love baking, we'll get along just fine.

Sign up and never miss a recipe or new post!

* indicates required

Search

Vitacost Healther Life Heather Discount

Copyright © 2026 Heather R Palmer LLC · All Rights Reserved · About Me · Disclaimer

Copyright © 2026 · Lifestyle Pro Theme on Genesis Framework · WordPress · Log in